
This is a pattern I’ve wanted to do since I was a teenager. I’ve always loved fitted flared bodices and I was particularly drawn to the traditional embroidery but I knew even as a teenager that I didn’t have the skill or the patience to do a garment like this justice.
So thank goodness Folkwear endures because 40 years of sewing experience and a fairly early retirement later, the pattern called again and I was able to answer!
The fabric is a cotton velveteen IKEA curtain thrifted while visiting my bestie Kim in Arizona. The interlining is a mystery fabric, the burn test says poly cotton. The sequins and beads are online purchases. The crochet cotton thread is Aunt Lydia’s size 10 from the hobby shop.
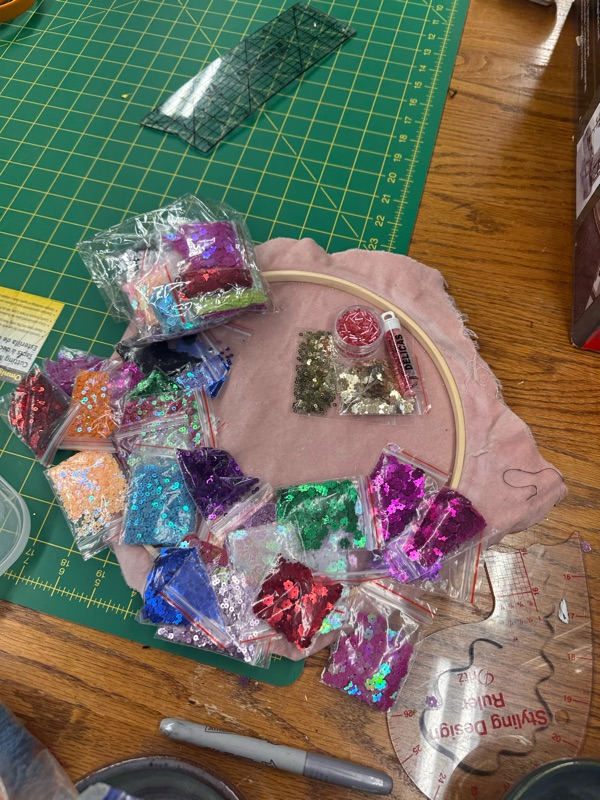
I started with some materials testing and design practice. I figured I’d work out techniques and designs on the smaller pieces of the pocket flaps and cuffs.


The pattern comes with lots of information about the history of the garment as made by the women in Bolivia. They make the chain stitch braid with their fingers but after trying it I realized my hands could never go the distance required, so I used a crochet hook. This is what remains of the ball of crochet cotton.

Can you I magine chainstitching the whole thing finger style? Mad respect to the Bolivian makers!
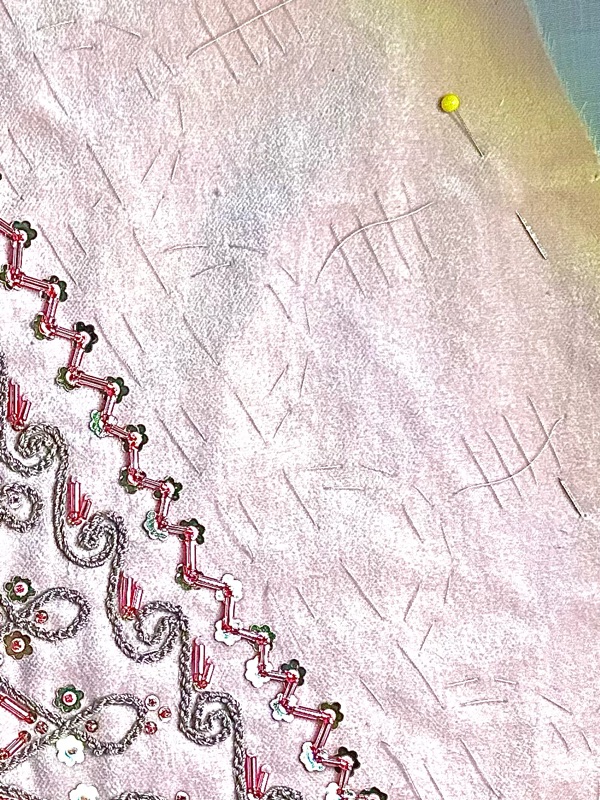
For all the pattern pieces I basted the interlining to the wrong side of the velvet, marked the edges and seam lines in pencil on the back, and thread basted the marks to see them on the right side.
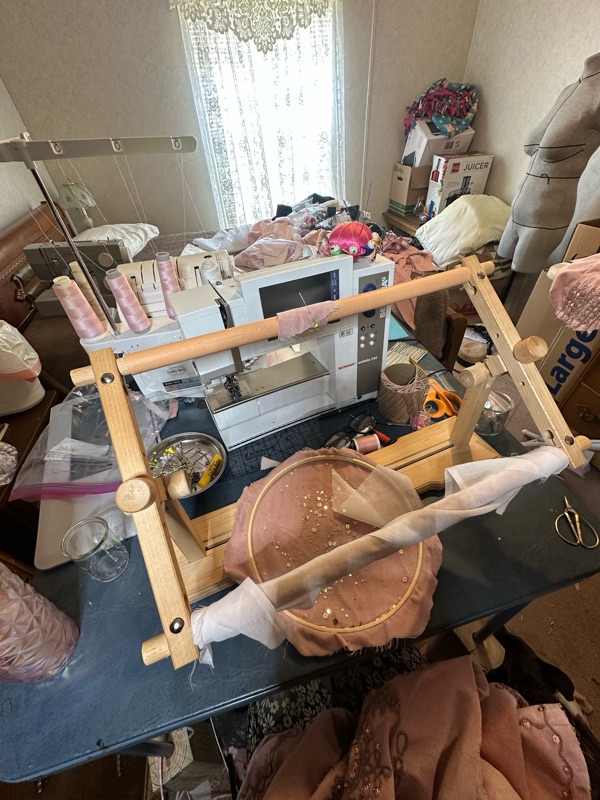
The smaller pieces fit easily into a large embroidery hoop, but I ordered a tambour frame for the larger pieces to come, partly to avoid hoop burn in the velvet pile but also to save my neck. I was able to set up the tambour frame so I looked forward instead of down and it made stitching so much more comfortable.

Tatting is one of my favorite crafts so I developed a series of related designs for the godets of the flared hemline.

I deviated from the pattern for the construction of the godets. The instructions have them with a seam in the center and I can see how easy that would be to apply in the seams but I wanted to be able to do the embellishment before the garment construction.
I didn’t have any plan for the godet designs, I just noodled around with tatted shapes til I hit on something I liked, and did the same with the beads and sequins.

The cuffs were similarly worked on the fly. No plan, just vibes, respecting the thread marking designating the seam lines. I’d like to note here that I just eyeballed any designs I didn’t have a plan for. I have a strong perfectionist streak I’m trying to temper. “Perfect is the enemy of finished, and also it’s folk fashion not haute couture, so chill!” was my daily mantra.


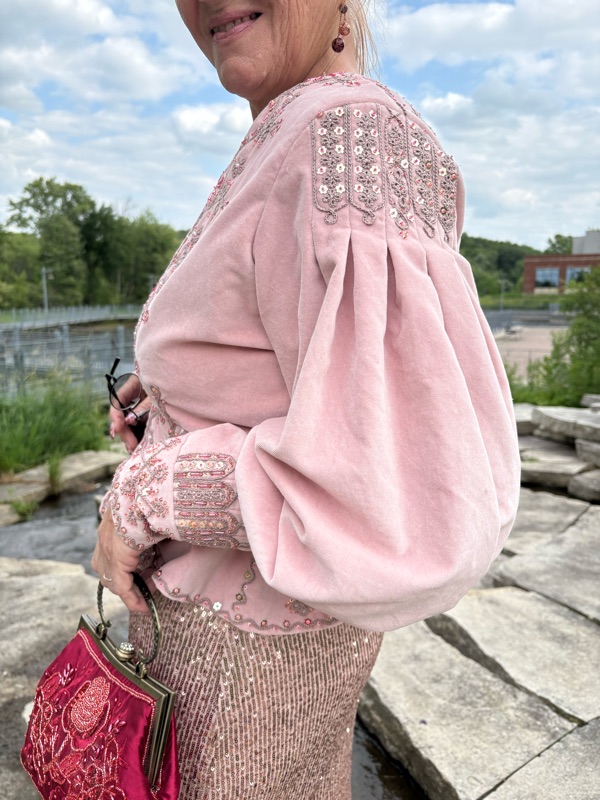
Small pieces done. Sleeves next. Interlining basted on as previously. I couldn’t put my hand on my marking wheel, but it turns out a dull pizza cutter works just fine. Thread basting to mark the pleats. I used a ladder stitch to draw the box pleats together accurately before machine stitching.


After completing each pleat area, I trimmed away the backing fabric strip closely.


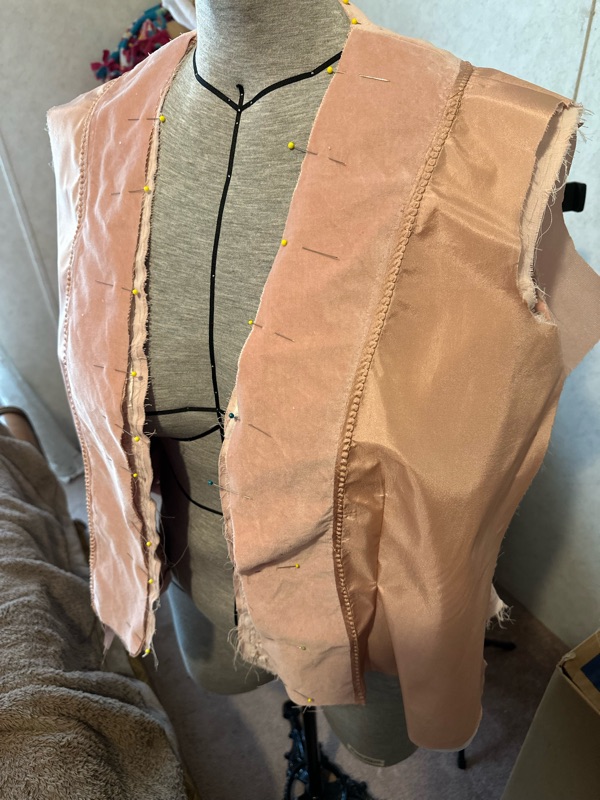
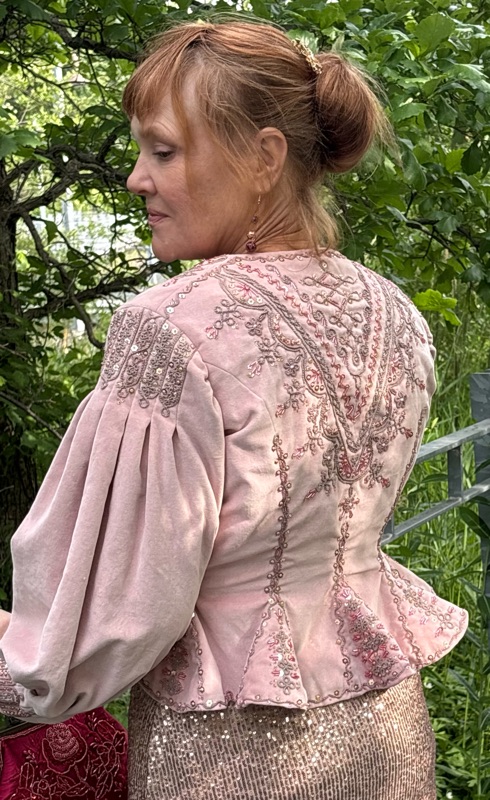
I’ve always loved the design Folkwear provided for the back of the traditional version of the jacket so I used that, with some minor variation. For the front I wanted the V-neck style that goes with the waist length version so I franken-patterned the V-neck onto the traditional bodice front pattern piece and carried the half circle motif from the back down the front.


Basted in the interlining as before, and unleashed the perfectionist to very carefully mark the design in pencil on the interlining of the back pieces. Sewed the pieces together and huzzah they matched!

Gave the perfectionist a cookie and put her to bed and thread marked all the landmarks of the design for visibility on the right side.
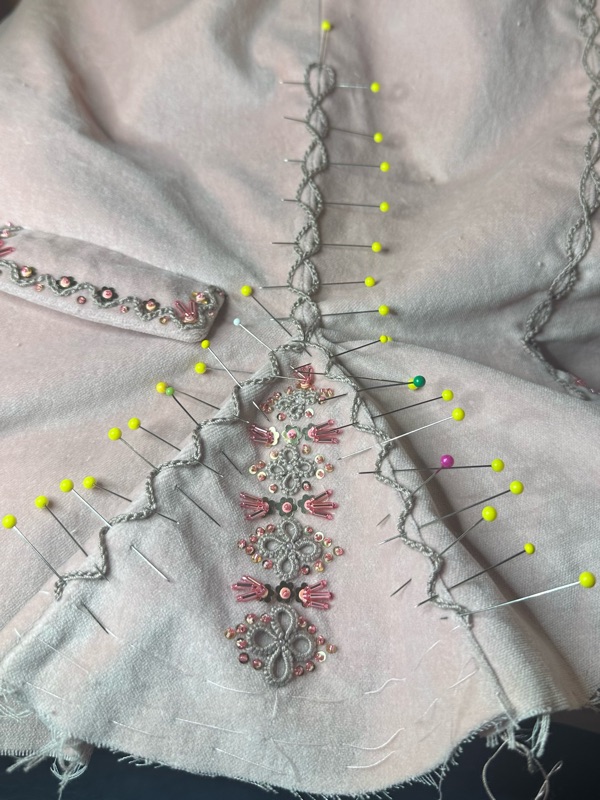
I mounted a full width of backing fabric onto the tambour frame and pinned the back to that. It fit almost the entire design, I only had to roll the design up a little on the top bar to get the very bottom point.

I worked the embellishment top down and center out. I could flip the tambour frame as needed for convenience. Liberal use of pins helped hold the chain in place for stitching. I fussed endlessly with the three strand braid, trying to lay it down one strand at a time as shown on the pattern instructions. Never satisfied, I finally decided to just crochet enough chain to braid three strands together and see what that did. I loosened the braid (if you’ve ever done fluffy Dutch braids in hair, you’d call it ‘pancaked’) and turns out it’s the exact same effect.


This was the perfect ADHD project. I could make the chain for a while, then switch to sewing down the design, then do some beadwork, or make a tatted motif. Always something different to do!
It was when I started the the half wheel motif that I realized I had a pink and white iridescent flower sequin in my manicure nails embellishment collection! It complemented the gold flower sequin perfectly.

I used a template to make sure the half wheel motifs matched at the front closure and it was at this time I realized I could have done a template for the scroll parts on the back too. Ah well, live and learn.


So the embellishment is done! (Dear reader, the embellishment was not, in fact, done!)
On to the jacket construction. I had figured out the fit with my dress form earlier, so stitching it up was easy. I applied the godets in the usual manner, sewing up each side and breaking the stitching at the point. As with the shoulder areas, I closely trimmed the seam allowances that would be pressed under the beaded area to reduce bulk. I learned previously that heavily pressing the sequin areas caused the shine to dull a little bit, so I did a little bit of pressing and a lot of basting seam allowances in place.

So, just the bottom wavy border to go right? Wrong!
The peplum godet designs seemed disconnected from the denser embellishments above.

I looked at how much crochet thread was left on the ball and jumped headfirst into a game of thread chicken. I added another wave design to frame the godets and emphasize the seam lines, drawing the eye upward.


I didn’t use another backing layer like I did for the back and front. I wrapped the bars of the tambour frame with scrap fabric and just sort of draped the jacket over and pinned it to the wrapped bars to hold it in place for this final embellishment.
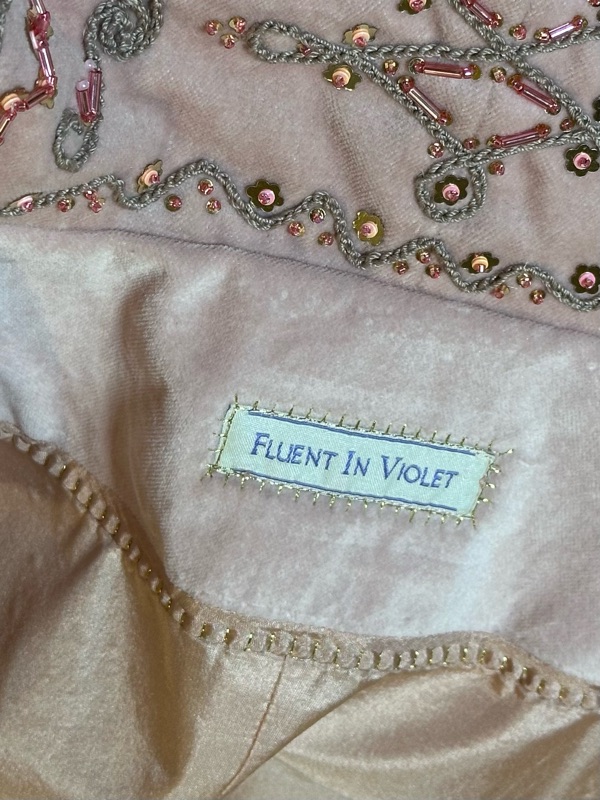
The lining is silk habotai. I did a velvet facing edge. I like to do a Hong Kong binding on the facing edge that meets the lining and attach the facing to the lining with a decorative stitch.
I bagged the lining, turning through the arm, stitched on the sleeves and then hand sewed the sleeve lining in place. The sleeves went on like sleeves always go on, with some gentle sleeve cap easing and the usual mild swearing.
Since I had beads and sequins clear up to the edge I pressed only very lightly and used sort of a pick stitch to flatten the edges. Very small stitches on the facing side, going up through beads or chain braid on the outside to hide the stitches.
The closures are the recommended hooks and eyes.
I absolutely love how this project turned out. My youngest is a member of the Iowa City Chamber Singers choir and I was able to finish it in time to wear to the last concert of their season which was a very good occasion for being fancy.

Frequently Asked Questions:
Q: How many beads and sequins did you use?
A: infinity plus one. Seriously though, I didn’t count but I used nearly three whole 7.5 gram tubes of Japanese delica beads, and the bugle beads came from four tubes of a bead mix by John Bead. The gold flower sequin came from a mixed set on Amazon that I had to order twice. The small gold and pink round sequins came from an Amazon set I bought once and then I found a supplier for two more packs of just the gold because at this point I’m drowning in surplus sequins of every color.
Q: How long did it take to make?
A: a baseball season, a football season and half of another baseball season. (I told this to a friend in Poland and she laughed and said “you Americans and your imperial units!” LOL! )
Seriously though, much of my time with this jacket was spent tucked up in the corner with my embroidery frame and craft light while my mom and my husband watched the Cardinals and the Chiefs. My first picture is time stamped July 9, 2024 and the video of my last stitch was recorded on June 7, 2025. I worked steadily over 47 weeks, with a three week break to make an unrelated costume for a sci-fi and fantasy convention Masquerade. I worked two or three hours per night most of the time. I did take some nights off, but if I averaged five nights a week, it comes out to about 440 hours total, from developing and practicing designs with the chain and sequins through to the final stitch on the last hook and eye. I never rushed anything, I just relaxed and enjoyed every single minute I worked on it.
Q: How do you work with those fingernails?
A: I’ve worn nails like this for so long now that I’m actually pretty clumsy without them. I’ve always loved long fancy nails so I learned to do sculpted gel extensions as a hobbyist about 10 years ago.
I did break my index fingernail on my dominant hand at one point during the project, and it was significantly harder to get beads onto my needle without my long fingernail. They also function as a surprisingly good thimble for pushing needles through tough situations.
In any case, my very itchy dog thinks my nails are great so that’s the end of that discussion. :D
If you like the magnificent sleeves of this pattern, take a look at another jacket I made using the sleeves: https://fluentinviolet.blogspot.com/2026/04/the-leaves-of-lorien-jacket-or-folkwear.html
No comments:
Post a Comment